About the film
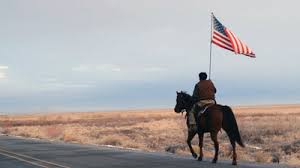
This past winter, I had the pleasure being the dialog editor for a new documentary by director and producer David Byars called “No Man’s Land” which will make it’s premiere at the Tribeca Film Festival this year. In the film, we follow a group of protestors as they take command over the Malheur National Wildlife Refuge in rural Oregon. They do this to protest what they view as the US federal government overstepping it’s authority as it pertains to the local ranchers land rights. I figured I’d talk a little bit here about my process and how I approached the dialog edit for the film.
The director, David Byars, spent several months inside the wildlife refuge filming the protestors interactions with each other, the media, and law enforcement. Interspersed with this footage are sit-down interviews with many of the key players as well as lots of archival clips taken from both the internet and network TV. This resulted in a wide range of audio quality… from pristine to borderline un-usable. Much of the archive footage that was taken off the internet had serious noise issues as well as a “chirpiness” that often comes from subpar digital compression. Additionally, some of the footage filmed inside and around the refuge itself was off mic and echoey as it wasn’t possible for the filmmakers to always have their subjects mic’d up or in an optimal filming environment. It was my job as the dialog editor to make this all sound as good as possible and prepare the tracks for mixing by Tom Efinger at Red Hook Post.
The Approach
This edit was one of my more challenging projects and that says a lot as I’ve probably edited and mixed 300+ hours of reality television in my career. Overall my approach was to try and get everything as consistent as possible.
The Tracklay

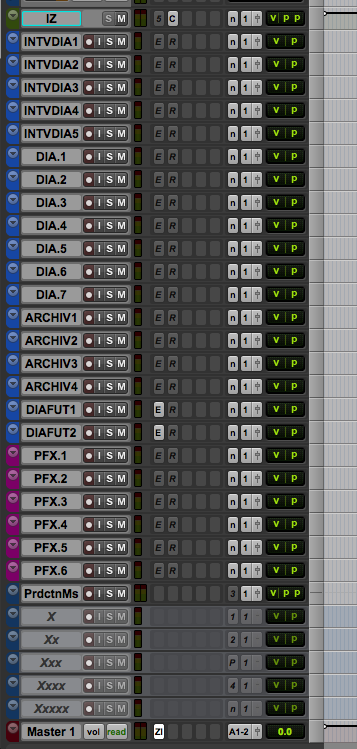
When starting on a project like this I like to watch the film down in it’s entirety before I start the edit. This familiarizes me the subject matter and let me take note of where the problem areas might be. It also gives me an idea of what tracks I need to create. In this case my track layout was as follows:
-
Interview Tracks- These were by far the best sounding. Well recorded in quiet environments. Almost always had a choice between a lavalier or boom mic.
- Regular Production Tracks- Audio quality varied between quite usable to horribly off-mic depending on, of course, what kind of room they were filming in and how far the subject was away from the microphone. Mostly a shotgun microphone attached to the camera. The environments ranged from inside and outside the refuge center to high school auditoriums to city environments.
- Archive Tracks- These tracks were generally of low audio quality. I believe most of this was taken off the internet.
- FUTZ Tracks- FUTZ in the biz means making audio elements sound like they are coming from an object in the real world. Such as a radio or television. There were several pieces of audio that the director want to sound like it was coming from a car radio.
- Production Sound Effect Tracks- Splitting out any audio from the production that had no dialog in the track. Examples of this might be the sound of a car passing by or the hooves of a horse on pavement or a door close. This makes it easier for the re-recording mixer to create M&E (music and effects) mixes and other deliverables, which is often a requirement for international distribution.
- X Tracks- Here I place unprocessed audio in case the mixer feels I was a little too heavy handed with my audio processing and wants to have clean audio to use his or her own processing on.
After that it’s a matter of going through the film and placing each piece of audio onto it’s corresponding track. This usually doesn’t take long… perhaps a few hours.
The Edit
Now the fun begins. I painstakingly go through every piece of audio and remove any clicks, mic bumps, sirens, birds, crackles, and anything else that might distract the viewer from the dialog. I aim to create as pristine audio track as possible. In addition to this noise removal, I also clean up any funky audio edits, replace missing room tone, and level out the audio using ProTools clip gain functionality. Picking matching room tones and blending it with others is particularly tricky with this type of work. Other than using Izotope RX, there are no fancy plugins or processes involved, just a lot of trial and error and hard work. At the end of this process, I should have an edit that could pass without any additional work.
Noise Reduction
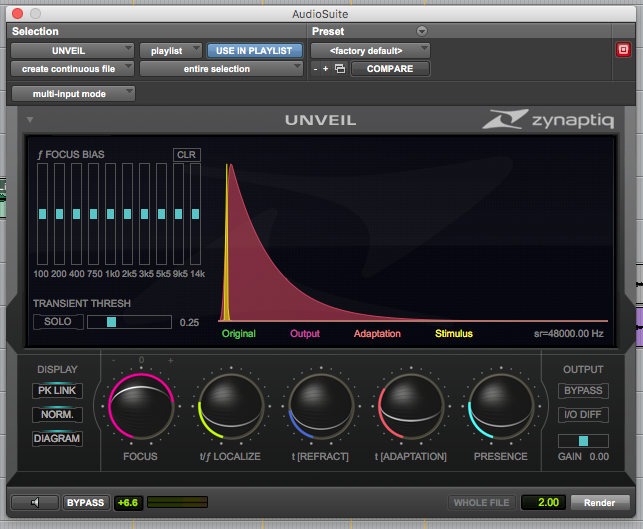
Next, I do a general noise reduction pass. This includes both broadband noise reduction as well as de-verbing any audio the sounds particularly echoey. I’ll use a combination of simple notching EQs, Izotope’s spectral and dialog de-noising, and Zynaptiq’s Unveil. I also used a bit of Zynaptiq’s Unchirp on the aforementioned “chirpy” internet video footage, but found it’s effectiveness limited.

To avoid over-processing, which is more common than you might think, I’ll adjust the clip to where I think it sounds good and then back off 5 to 10 percent. I do this, because when the film gets to a mixer, he’ll have his own processing setup on the dialog buss of his mix session. Another caveat, some mixers prefer to do their own processing, so in that case I’ll only do a notching pass and perhaps a small amount of de-verbing. No matter what, I’ll always include an unprocessed version on the X tracks.
Conclusion
All in all, the whole edit took me about 2 1/2 weeks. I’m happy with how it turned out and am looking forward to seeing it on the big screen at Tribeca! Feel free to ask any questions in the comments!